
Key takeaways
- Floor-level transfers preserve independence and freedom to do everyday activities without fear or avoidance.
- Box squats, lunges, incline push-ups, and planks build leg, arm, and core strength needed to rise safely from the floor.
- Consistent training 2 to 3 times per week makes floor transfers easier without requiring full floor practice at every workout.
Getting up from the floor without assistance is a skill worth preserving after age 70. Whether you need it after kneeling to retrieve something, spending time on the ground with family, or recovering from a stumble, the ability to return to standing keeps you independent and active.
Why Floor Transfers Matter
Mobility at floor level represents more than just physical capacity; it signals your independence. The moment getting low feels difficult, many people begin avoiding activities that require it. Gardening, playing with grandchildren, and even picking something up from the ground become things you sidestep rather than do. Staying comfortable with floor-level movement preserves your freedom to handle your own life, which research ties closely to healthy aging and overall quality of life.
What Muscles Do the Real Work
Your legs carry the load when you rise from the floor. Arms and your midsection play supporting roles, helping you stabilize and push as you transition upward. Stronger muscles throughout these areas also improve your ability to catch yourself if you stumble. You may recover your balance and prevent hitting the ground, though building strength cannot eliminate fall risk entirely. This is why a complete training approach targets both the legs that lift you and the upper body and core that steady the motion.
Box Squats Build Lower Body Strength
According to Eat This Not That, box squats strengthen the thighs and glutes through a movement pattern you already use every day when you stand up from a chair. The box itself provides consistent depth, giving you a fixed target and an easy way to track progress as your legs strengthen.
How to Perform Box Squats
Start with a box or bench at a height where your knees bend roughly 90 degrees when you sit. Keep your chest upright and your weight in your heels. Lower yourself under control until you touch the box briefly, then stand by driving through your legs. Your arms can rest at your sides or reach forward for balance.
Sets, Reps, and Progression
Perform 2 to 3 sets of 8 to 12 repetitions. Rest 45 to 60 seconds between sets. As you gain confidence, try variations: a higher box squat to build initial strength, a supported box squat holding onto something stable, or a slower descent to increase time under tension.
Lunges Prepare Your Legs for Uneven Movement
Floor transfers rarely keep both legs working equally. You typically move through a split stance or kneeling position before you stand, and lunges prepare your legs for exactly that uneven setup. Eat This Not That recommends holding a chair or countertop for balance, letting your arms provide stability while your front leg does the work of building strength.
Support and Stance
Grip a sturdy piece of furniture for balance without pulling yourself up. Step forward with one leg, lower your hips until both knees bend, then push back to standing. The support is there if you need it, but your legs should drive the movement.
Volume and Variations
Perform 2 to 3 sets of 6 to 10 repetitions on each side, resting 45 to 60 seconds between sets. Try a smaller-range assisted lunge if the full range feels risky, a supported split squat from a staggered stance, or an assisted reverse lunge stepping backward instead of forward.
Incline Push-Ups Build Pressing Strength
When you’re on the floor, your arms may help you push away or grip a sturdy piece of furniture as you stand. Incline push-ups build the pressing strength you need without requiring you to start at ground level. A wall or a high counter works well initially, and you can lower the surface as your chest and triceps strengthen.
Finding Your Starting Height
Begin at a height where you feel stable and controlled; a wall is a good starting point. Place your hands on the surface slightly wider than shoulder-width, step your feet back, and lower your body until your chest nears the surface. Push back to the start position under control.
Building Toward Strength
Perform 2 to 3 sets of 8 to 12 repetitions, resting 45 to 60 seconds between sets. Progress by using a wall push-up before moving to a higher incline surface, then lowering the surface as you adapt. Slower repetitions, taking 2 to 3 seconds to lower and 2 seconds to push back, increase time under tension and build more strength.
Incline Planks Develop Core Control
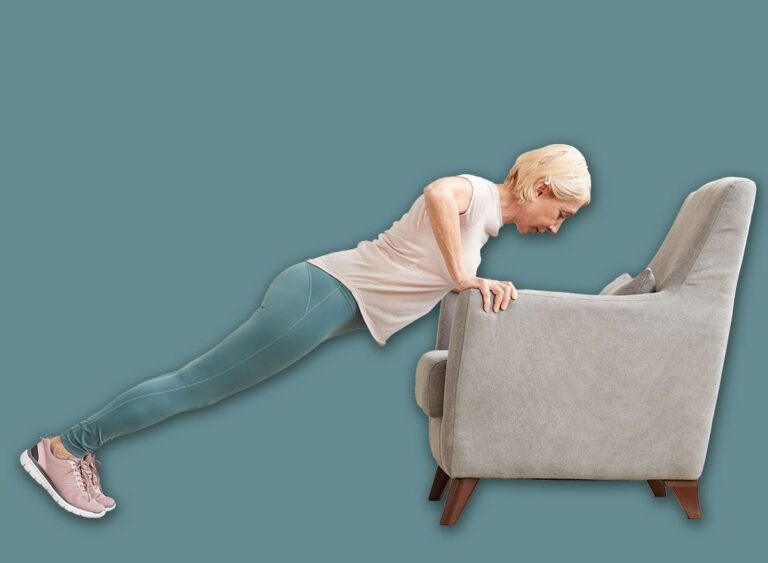
Changing positions near the floor demands more than strong legs alone. Your midsection must keep you stable while your arms and legs reposition, especially when you’re leaning on a chair or another surface for support. An incline plank lets you practice that stability and control from a height you can manage before you ever need it on the ground.
Core Engagement and Balance
Set your hands on a chair seat, bench, or elevated surface with your body in a straight line from head to heels. Breathe steadily and maintain that alignment without letting your hips sag or pike upward. This teaches your core to stay tight during transitions.
Duration and Progressions
Hold for 2 to 3 repetitions of 20 to 40 seconds, resting 30 to 45 seconds between holds. Start with a wall plank using just your hands on a wall surface, progress to a forearm incline plank on a bench or counter, then lower the surface as you adapt. Each variation builds control without the demand of floor-level work.
Making Progress With Consistency
You don’t need to practice full floor transfers at every workout to improve. Training box squats, lunges, incline push-ups, and incline planks on a consistent schedule, say, 2 to 3 times per week, builds the specific strength and stability required. Everyday movement offers simple markers of progress: noticing that standing from a chair feels easier, lowering yourself with control takes less effort, or kneeling and rising happens without hesitation. These small wins accumulate into restored independence and confidence in your ability to handle the situations that require floor-level movement.
Source: Eat This Not That
Frequently Asked Questions
Can these exercises eliminate the risk of falls?
No. According to Eat This Not That, stronger muscles may help you recover your balance before you hit the ground, but no exercise can remove fall risk completely.
How often should I do these exercises to improve floor transfers?
You don't need to practice full floor transfers at every workout. Training these exercises on a consistent schedule, 2 to 3 times per week, builds the specific strength and stability required.
What's a good starting height for incline push-ups?
A wall or high counter works well initially. You can lower the surface as your chest and triceps get stronger.
