
Key takeaways
- Wall sits are an isometric exercise where your quadriceps, glutes, hamstrings, and calves build strength without moving, making them ideal for adults over 60.
- The seven-day progression starts with three fifteen-second holds and advances to three forty-second holds, increasing duration and intensity as your legs adapt.
- Proper form requires your feet hip-width apart, knees aligned with your toes, and shoulders relaxed against the wall—common mistakes include weight shifting to heels or knees caving inward.
- Pair wall sits with chair squats, step-ups, and calf raises two to three times per week to support stronger stairs, easier sit-to-stands, and more dependable legs.
Wall sits demand nothing but stillness. For the first ten seconds, your legs barely acknowledge the wall behind you. Then your thighs begin to feel the load. By twenty seconds into the hold, your glutes, calves, and midsection all pitch in to prevent you from sliding downward or tilting side to side. Despite the absence of visible movement, the tension running through your lower body becomes undeniable.
This seven-day progression introduces a low-impact method for rebuilding leg strength in adults over 60. Unlike exercises that require momentum or joint rotation, wall sits keep your body in a controlled position where the wall itself stabilizes your torso. That support lets you concentrate on three essentials: pressing force evenly through both feet, maintaining vertical alignment between your knees and toes, and holding a depth you can sustain for the entire duration. The progression moves step by step, adding seconds and intensity only as your legs adapt.
Understanding Wall Sit Mechanics
What Unfolds During the First Twenty Seconds
The opening seconds of a wall sit reveal little drama. Your back remains flat against the wall, your weight settled into your feet. Nothing is happening—until the time reaches ten seconds. Then signals from your thighs intensify. At the twenty-second mark, your entire lower body has entered the effort: the quadriceps carry the primary load, while your glutes, hamstrings, calves, and core musculature work together to keep you stable and upright. This recruitment happens without any movement—your body is creating force against an immovable object.
Which Muscles Build and Stabilize
Wall sits are isometric exercises, meaning your muscles generate tension and strength without moving through a range of motion the way a squat or step-up would. Your quadriceps shoulder most of the burden. The glutes fire to prevent your hips from rolling. Hamstrings and calves assist your knees and ankles in holding their position. Your core tightens to keep your torso upright against the wall. Together, these muscle groups create an integrated chain: remove support from any one of them, and the hold collapses. This integrated demand is what makes wall sits so effective for functional strength—the muscles you need to climb stairs, rise from a chair, or walk on uneven ground all activate simultaneously.
Why the Wall Makes This Safer for Older Bodies
The wall removes one variable that challenges people past 60: balance. Your torso is supported, so you can direct all your attention downward to your feet and legs. You never have to brace against unexpected shifts. This stability means you can start at a higher position—one that challenges your thighs without exhausting your stabilizer muscles—and spend more time under tension. Progression becomes straightforward: add five seconds, maintain the same depth and posture, and repeat. The wall provides an honest feedback mechanism: if your form slips, you’ll feel your back slide or your weight drift onto your heels, signals you can correct in real time.
Mastering Your Form Foundation
The Three-Point Form Checklist
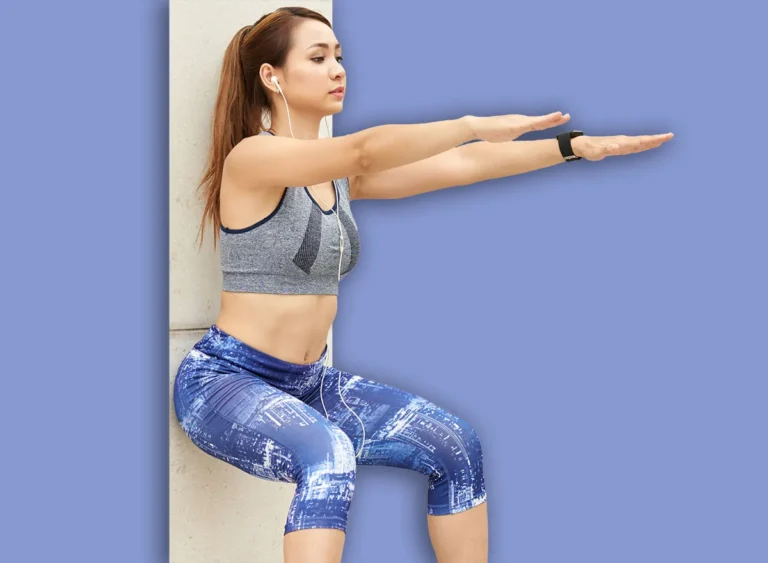
A proper wall sit rests on three positioning elements:
- Feet: Place them about hip-width apart, roughly twelve to eighteen inches from the wall. Press force evenly through your entire foot—heels, midsole, and ball of the foot should all feel active.
- Knees: They should point in the same direction as your toes—straight ahead, not caving inward or flaring outward. Your shins should be close to vertical; if your knees drift forward past your toes, lower your position slightly.
- Torso: Your entire back should remain in contact with the wall, from your shoulders down to your glutes. Your shoulders stay relaxed; avoid hunching them toward your ears.
This aligned position becomes your reference point for every hold across all seven days.
Common Alignment Traps
Several shifts happen when fatigue sets in. Your weight may drift onto your heels—a sign you’re losing engagement in your quads and asking your calves and hamstrings to handle too much. Counter this by consciously pressing through the front half of your foot. Your knees may angle inward toward each other, a pattern called valgus collapse. This reduces the load on your quads and increases stress on your knees. Stay aware of your foot position and imagine pressing your knees outward against an invisible wall. Your torso may peel away from the wall, with your hips sliding forward and your shoulders rounding. Breathe steadily and use the wall as your guide to stay tall.

Your Seven-Day Wall Sit Challenge
The seven days follow a structured arc: find your depth on day one, refine your technique through the middle days, and reach your benchmark on day seven.
- Day 1: Finding Your Depth — Perform three wall sits, holding for fifteen seconds each. Rest forty-five to sixty seconds between holds. The goal is to discover a position where your thighs feel genuine work but your posture remains stable from the first second to the last.
- Day 2: Adding Duration — Perform three wall sits, holding for twenty seconds each. Rest forty-five to sixty seconds between holds. An extra five seconds may sound minor, but the change in sensation is substantial once your quads activate.
- Day 3: Consistency Under Load — Perform three wall sits, holding for twenty-five seconds each. Rest sixty seconds between holds. By this point, your legs have a clearer understanding of the position.
- Day 4: Repeating the Effort — Perform three wall sits, holding for twenty-five seconds each. Rest forty-five to sixty seconds between holds. Matching day three’s workload gives you an opportunity to refine the details.
- Day 5: Increasing Total Volume — Perform four wall sits, holding for twenty-five seconds each. Rest sixty seconds between holds. Adding a fourth repetition increases the overall work without forcing a dramatic jump in hold duration.
- Day 6: Peak Single Duration — Perform three wall sits, holding for thirty-five seconds each. Rest sixty to seventy-five seconds between holds. This is the longest individual hold of the week.
- Day 7: Your New Baseline — Perform three wall sits, holding for forty seconds each. Rest sixty to seventy-five seconds between holds. By the final day, your legs should feel more at home in the position.
Progression and Recovery Between Sessions
How Rest Periods Support Strength Gains
The seconds you spend resting between holds are as important as the seconds you spend holding. During rest, your muscles’ energy systems begin to refill. Your breathing returns to normal. Lactic acid starts to clear. When you return to the wall, your legs have enough reserve to maintain form on the next repetition. The protocol varies slightly across the week: most days you rest forty-five to sixty seconds, but days three through seven extend to sixty to seventy-five seconds as the hold length increases. This ratio—work to rest—keeps you challenged without overwhelming your nervous system.
When to Lower Your Position
Progression comes in two forms across the seven days. The primary method is adding duration: each day you extend your hold by a few seconds. Once you move beyond day seven, the secondary method is depth. Lowering yourself by an inch or two in the next week adds intensity without changing the hold time. Never rush into a lower position. If you cannot maintain alignment at a lower depth, stay at the height where you can. Form always comes first.
Building on Day 7: The Next Phase
Complementary Lower-Body Exercises
The wall sit challenges your quads, glutes, hamstrings, calves, and core, but it is not a complete lower-body program. To maximize the strength you’ve built, pair wall sits with these three additional movements:
- Chair squats—lowering your hips back toward a seat until your thighs are near parallel—reinforce quadriceps and glute strength with a dynamic component.
- Step-ups, using a six- to eight-inch step, strengthen your quads and glutes while your stabilizer muscles engage to maintain balance.
- Calf raises, performed while standing and holding a counter for balance, target the muscles in your lower legs that support your ankles and knees.
Together with regular walking, these exercises create a functional foundation for stronger stairs, easier sit-to-stands, and legs you can depend on throughout your day.
Integrating Wall Sits Into Your Weekly Routine
Seven days can establish a strong starting point, particularly when your legs have not had much recent strength work. After you complete day seven, keep wall sits in rotation. Perform them two to three times per week, using day seven’s benchmark of three forty-second holds as your maintenance point. Each week, you can add a few seconds to each hold or lower your position by a small margin. Some weeks, you may simply repeat the previous week’s work—that consistency is valuable. The calendar provides structure, but form, recovery, and repeatability ultimately determine how much strength you build. Pair wall sits with your other lower-body exercises, maintain regular walking, and revisit this challenge monthly to monitor your progress.
Frequently Asked Questions
How long should I hold a wall sit for on day one?
On day one, perform three wall sits holding for fifteen seconds each, with forty-five to sixty seconds of rest between each hold.
What muscles does a wall sit work?
Wall sits engage your quadriceps as the primary muscle, while your glutes, hamstrings, calves, and core all work together to maintain the position and keep your body stable.
What should I do after completing the seven-day challenge?
After day seven, keep wall sits in your routine two to three times per week as a maintenance point, and pair them with complementary exercises like chair squats, step-ups, and calf raises, along with regular walking.
